0. Foreword & Tips
Assembly Guide Structure
This assembly guide is organised into several sections that have to be followed in numerical order. The same applies to the steps of each section. Please note that if two steps have the same number, you only need to complete one of them based on the add-ons you bought.
Before starting each step, make sure you have carefully read the written instructions and watched the animation entirely. This will prevent you from making small mistakes and get you to assemble your machine much faster.
Keep in mind that parts should easily fit together and do not require important force to assemble. If you feel it is the case, stop what you are doing and read again the instructions before trying one more time.
Safety Warnings
Electricity & Wiring
To safely use the vacuum pump, your electrical installation must include a 32A circuit breaker and (2+G) x 6mm² cables (such as the XGB 3G6 for instance). We include all the necessary sockets in our kit and you will receive wiring instructions in this guide.
Heavy Goods
Certain components of this vacuum pump are very heavy and can pose a risk of injury if handled improperly. Always use appropriate lifting techniques and avoid attempting to move or assemble these components alone. We strongly recommend working with a partner to ensure safe handling during installation or maintenance. Your safety is our priority, please proceed with caution.
Debris
The pump must operate in a debris-free circuit. Before assembling the pipes, ensure they are clean - if any dust or particles are present, blow them out. Due to their electrostatic properties, debris can accumulate during transportation despite our best efforts to ship them clean.
Tools needed
|
|
Allen Key /3/4/5/6 mm |
|
Spanners 7/8/10 mm |
|
Screwdriver |
|
Measuring Tape |
Tips & tricks
Liquid soap

In this assembly, you'll have to connect pipes together. A very simple task that could prove very physical if you try to do it without soap! Using liquid dishwashing soap, apply it all around the end of the tube to be joined before attaching it to the connector. The soap will act as a lubricant and greatly simplify the task.
Sliding Nuts
A quick note on this component that you will encounter very often during the assembly. A sliding nut is supposed to be inserted from the side of the aluminium profile slots and slid towards the desired position.
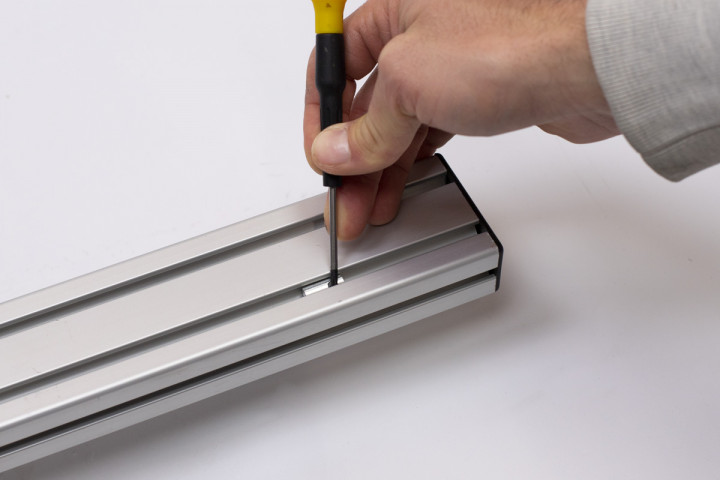
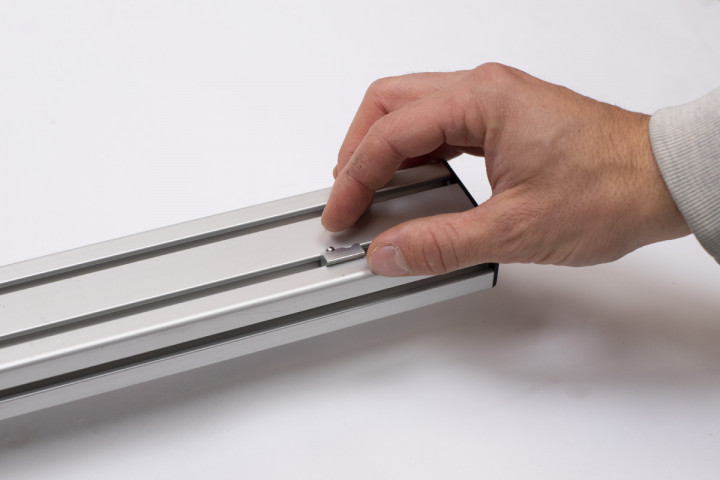
However, if at some point you realise that you forgot to insert one - and that you can't access the side of the aluminium profile anymore - don't panic! No need to disassemble everything, this type of sliding nut has a ball spring and can also be inserted from any location on the aluminium profile.
Simply place it on top of the profile's slot and use a thin hex key or screwdriver to turn it and lock it inside the slot.

