1. X-axis Carriage

Step #03 - Z-axis Ballscrew Assembly

List of Components

ItemSpecQty High-Z kit
 Ballscrew (+ premounted nut)250mm1/
 Ballscrew (+ premounted nut)350mm/1
 Ballscrew nut housing-11
 Counter nut (in the FK12 box)M1011
 Bearing supportFK1211
 Motor couplerD25L3011
 DIN912 screwM5x1666

Tools needed

Allen Key 4mm Allen Key 2mm Spanner 14mm

Instructions

  1. Use 6 screws to tighten the nut housing to the ballscrew nut.
    1. Position the bearing support on the ballscrew, paying attention to its orientation.
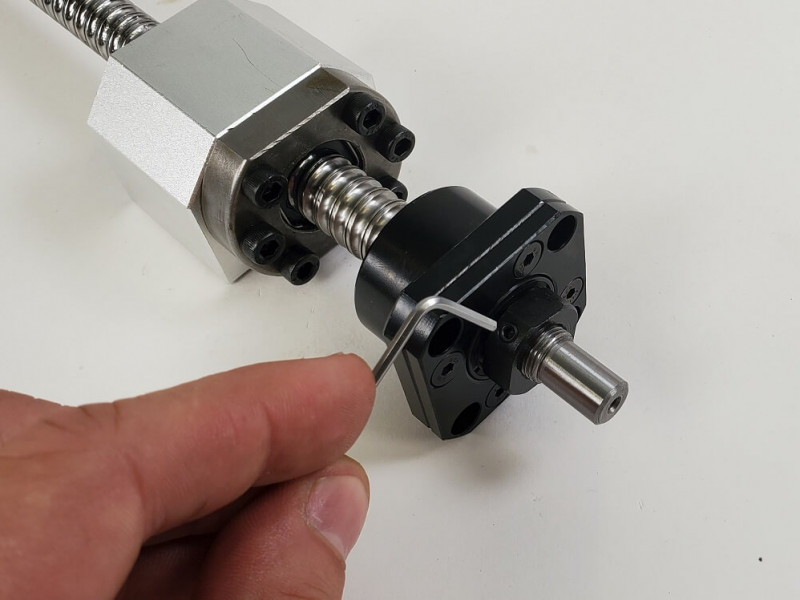
      1. Use the counter nut to tighten the bearing support to the ballscrew. Don't forget to also tighten the small screws located on the sides of the counter nut (see picture below).
        1. Place the motor coupler at the end of the ballscrew and firmly tighten it using the small pressure screws.

          Animation

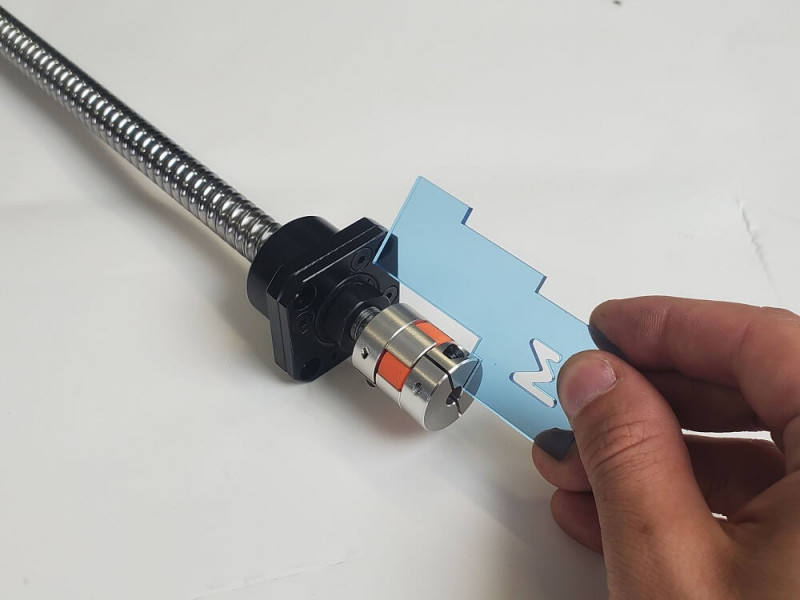
          As shown below, use the custom gauge to make sure that the coupler is attached to the ballscrew at the correct position.
          Never remove the ballscrew nut! It is always premounted in the correct position.